
















Few upgrades do more for the safety and convenience of a home than well-planned sensor and security lighting. A light that switches itself on the moment someone approaches removes the shadows intruders rely on, lights your path when your arms are full, and saves power by running only when it is needed. But with sensor lights now spanning everything from simple standalone detectors to camera-integrated smart floods, choosing the right setup can feel daunting. This practical guide walks you through how the technology works, where to place it, and how to avoid the false triggers that drive people mad.
How Motion Sensors Work: PIR vs Microwave
Almost every motion sensor light relies on one of two detection technologies, and understanding the difference helps you pick the right fixture for the spot.
PIR (Passive Infrared)
A PIR sensor is by far the most common type used in domestic security lighting. It detects the infrared heat given off by a person, animal or vehicle as they move across its field of view. Because it reads changes in heat rather than emitting anything itself, a PIR is energy-efficient, reliable and well suited to detecting people approaching a door, gate or driveway. The trade-off is that PIR works on line of sight, so it needs a clear view of the area and is best triggered by movement crossing the beam rather than heading straight towards it.
Microwave (Radar)
A microwave sensor emits high-frequency radio waves and measures how they bounce back, detecting motion from the change in the reflected signal. Microwave sensors are more sensitive than PIR, cover a wider area, and can even detect movement through thin materials such as glass or light partitions. That sensitivity is a double-edged sword: it makes them excellent for large or awkward spaces but also more prone to false triggers, so they are more often found in commercial and utility settings. Some premium fixtures combine both technologies to confirm a genuine trigger and cut nuisance activations.
Standalone Sensors vs Sensor-Integrated Lights
There are two ways to add motion control to your lighting, and the right choice depends on how much you want to light and how flexible you need to be.
- Sensor-integrated lights have the detector built into the fixture itself, such as a wall light, bulkhead or flood with an on-board PIR. They are neat, quick to install and ideal when you want a single light to cover one entry point. Most have adjustable settings on the fixture for range, sensitivity and time delay.
- Standalone sensors are a separate detector wired to control one or more ordinary lights. This approach lets a single sensor switch several fixtures at once, or lets you position the detector in the best spot for coverage while the lights sit where they look best. It is the more flexible option for lighting a larger area or an existing set of fixtures.
For a straightforward job like a back door or side gate, an integrated sensor light is usually the simplest answer. For lighting a whole yard or a run of lights from one trigger point, a standalone sensor gives you more control.
Detection Range, Angle, Placement and Height
Even the best sensor underperforms if it is poorly placed, so this is worth getting right. Two figures define a sensor's coverage: its detection range (how far out it reads movement) and its detection angle (the width of the arc it watches, often up to around 180 degrees on a wall-mounted PIR).
Mounting height has a big effect. Fitted too high, a PIR can miss people close to the wall; fitted too low, its range shortens and it triggers on pets or passing cars. Most domestic PIR fixtures are designed for a moderate mounting height around head-to-eave level, so check the manufacturer's guidance for the specific unit. Aim the sensor so movement crosses its field of view rather than walking directly at it, as a PIR detects side-to-side motion far more readily than head-on approach. Point it at the approach to a door or gate, keep foliage and obstructions out of the beam, and angle it slightly downward to concentrate coverage where people actually walk.
Avoiding False Triggers
Nuisance triggering is the single biggest frustration with motion lights, and almost all of it comes down to placement and settings. To keep your light switching on only when it should:
- Aim away from heat and movement sources such as air-conditioning units, pool pumps, busy roads, driveways used by neighbours, and reflective surfaces.
- Adjust the sensitivity down if the light reacts to small animals or distant movement, and dial the range back so it only covers your own property.
- Set a sensible time delay so the light stays on long enough to be useful but resets promptly.
- Keep the lens clean and clear of cobwebs, dust and overhanging plants, which can all cause phantom triggers.
- Mind the wind, as swaying branches or hanging washing in the beam will set a sensitive sensor off repeatedly.
Choosing a fixture with independent adjustment for range, sensitivity and time delay makes fine-tuning far easier once it is installed.
Flood, Wall and Bollard: Matching the Fixture to the Job
Sensors are built into several fixture styles, and each suits a different part of the property.
- Sensor flood lights throw a broad, bright beam and are the classic choice for security. Mounted high on a corner, garage or gable, a motion-triggered flood lights up a driveway, backyard or side access the moment anyone enters. Explore flood lights for high-output coverage.
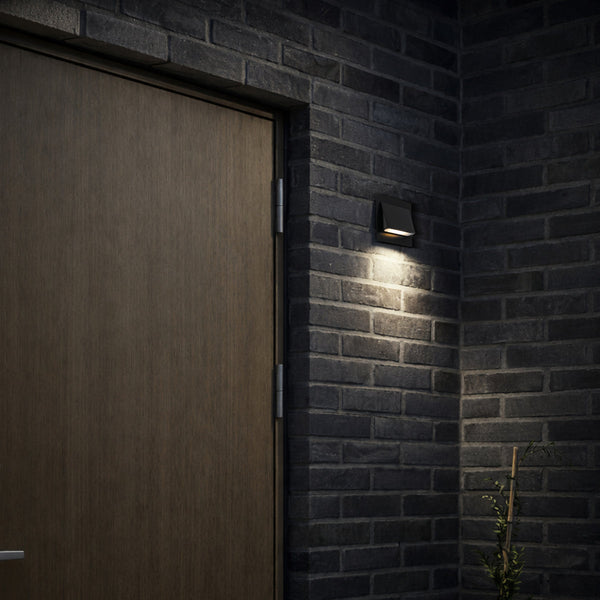
- Sensor wall lights and bulkheads sit at entries, porches and along walls, combining a welcoming architectural light with hands-free convenience. They suit front doors, back entries and passageways where you want style as well as function.
- Bollard lights with sensors line paths, driveways and garden edges at low level, marking the way and adding a layer of passive security along the ground where a high flood cannot reach.
Many homes use a combination: a bright sensor flood for the main deterrent, softer sensor wall lights at the doors, and bollards to guide movement through the garden.
Smart and Camera-Integrated Options
If you want more than a light that simply switches on, smart and camera options add another layer. Smart security lights connect to Wi-Fi or a hub so you can schedule them, set dusk-to-dawn behaviour, adjust settings from your phone and receive alerts when motion is detected. Some outdoor fixtures integrate a security camera directly, pairing bright motion-activated light with recording and phone notifications in a single unit. These suit anyone who wants remote monitoring alongside illumination, though a hard-wired sensor flood remains the more dependable choice for pure, always-ready deterrence.
IP Rating: Built for the Weather
Because sensor and security lights live outdoors, the IP (Ingress Protection) rating matters. It tells you how well the fixture resists dust and water. A light fully exposed to driving rain needs a solidly weatherproof rating, while one tucked under a deep eave or porch is less demanding, so match the rating to the exposure. If you live near the coast, as much of Australia does, salt air is the real enemy: look for corrosion-resistant or marine-grade construction and check the manufacturer's guidance on coastal suitability before buying.
Colour Temperature
Colour temperature, measured in Kelvin (K), sets the character of the light. Lower numbers are warmer, higher numbers cooler and crisper. For security and utility zones, a natural or cool white (around 4000K to 5000K) gives crisp, alert clarity that makes faces and detail easy to see. For entry and wall lights where you want a more welcoming feel, a warm white (around 3000K) is more inviting. Many current fixtures are CCT selectable, with a switch that lets you choose the colour temperature at install time, which is handy for keeping a consistent look across the property.
Sensor and Security Lighting Checklist
- Define each zone: deterrence, entry convenience, or pathway guidance.
- Choose the detection technology: PIR for most homes, microwave for large or difficult areas.
- Decide between an integrated sensor light and a standalone sensor driving several fixtures.
- Match the fixture type to the job: flood, wall/bulkhead or bollard.
- Check detection range and angle suit the area you need covered.
- Plan the mounting height and aim so movement crosses the beam.
- Choose a model with adjustable range, sensitivity and time delay to curb false triggers.
- Match the IP rating to the exposure, and pick coastal-grade near the sea.
- Select a colour temperature, or a CCT-selectable unit for flexibility.
- Consider smart or camera integration if you want remote monitoring.
- Book a licensed electrician for any mains-wired installation.
Frequently Asked Questions
What is the difference between a PIR and a microwave sensor?
A PIR (passive infrared) sensor detects the body heat of people, animals and vehicles moving across its field of view, making it efficient and reliable for home security. A microwave sensor emits radio waves and reads their reflection, giving wider, more sensitive coverage that can even detect through thin materials, but with a greater tendency to false-trigger. PIR suits most domestic settings; microwave is more common in large or commercial spaces.
How do I stop my motion sensor light triggering all the time?
Most false triggers come from placement and settings. Aim the sensor away from roads, driveways, air-conditioning units and reflective surfaces, reduce the sensitivity and range so it only covers your property, set a sensible time delay, and keep the lens clear of cobwebs and overhanging plants. A fixture with independent adjustment for range, sensitivity and time delay makes this far easier.
How high should I mount a sensor light?
Most domestic PIR fixtures are designed for a moderate mounting height around head-to-eave level, so follow the manufacturer's guidance for your specific unit. Too high and the sensor can miss people close to the wall; too low and it shortens the range and triggers on pets or passing cars. Aim it so movement crosses its field of view rather than walking straight at it.
What IP rating does an outdoor security light need?
Match the rating to the exposure. A fixture fully open to the weather needs a solidly weatherproof rating, while one under a deep eave or porch is less demanding. Near the coast, also look for corrosion-resistant, marine-grade construction to withstand salt air.
Can I install a sensor light myself?
Solar and low-voltage plug-in options can often be DIY. Any fixture hard-wired to 240V mains, however, must be installed by a licensed electrician in Australia for both legal and safety reasons.
Ready to Secure Your Property?
From compact PIR wall lights to high-output motion-activated floods and smart camera fixtures, we stock trusted brands including Havit, Domus, SAL and Brilliant to suit every zone of your home. Browse the full range and shop sensor lights online. Enjoy fast delivery Australia-wide, or visit our Ashfield showroom in Sydney to see the fixtures in person and get friendly, expert advice.
Shop Sensor Lights at Lights For You
Browse our full Sensor Lights range, or start with a few popular picks: